

With all the beauty influencers, YouTubers, and 13-year-olds who could pass for 20-year-olds out there, it’s easy to feel like you’re the only one in the world who can’t do makeup like a pro. But don’t believe the lies you tell yourself! Anyone (yes, even you) can be good at doing their own beat with a few makeup tips and a little guidance. Whether you’re looking to tackle the cat eye or finally figure out how to contour and highlight, I’ve got 17 must-try makeup tips for you below. So grab your makeup bag and that one product (err, products?) you never learned how to use, and keep scrolling.
Makeup Tip #1: Melt Your Pencil Liner to Help It Glide

Kathleen Kamphausen
Fact: Creamy makeup products blend better when they’re warmed up. So if your kohl eyeliner pencil skips or tugs on your eyelid or takes multiple coats for a decent color payoff, melt it down slightly before you start lining. To do so, hold the tip of your under the flame of a lighter for a second or until it gets tacky, let it cool slightly (swatch it on your hand to make sure it’s not too hot or melted), then watch the consistency change right before your eyes.
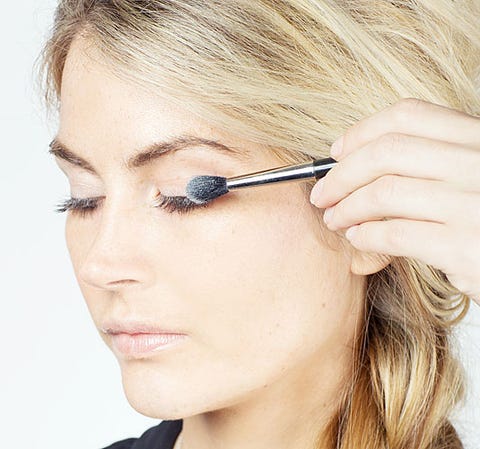
Makeup Tip #2: Use White Eyeliner to Make Your Eyeshadow Pop
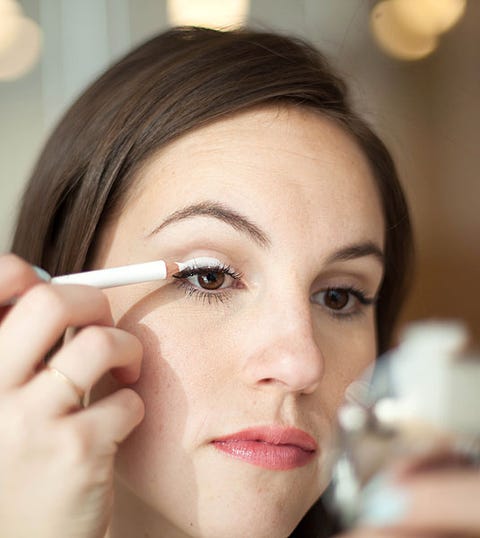
To make a sheer or less pigmented eyeshadow appear more vibrant on your eyelid, blend a over your entire eyelid first. Then, put your eyeshadow right on top. The opaque coverage of the white liner will intensify any eyeshadow shade and make it pop.
Makeup Tip #3: Outline Your Cat Eye First

Elizabeth Griffin
If you’re struggling with nailing your winged eyeliner look (also, hi, same, I feel you), try drawing the outline of the shape first and then filling it in. Extend a line beyond your lower lash line to create the bottom of your cat eye first. Then, decide on the thickness you want for your wing, and trace the top line from the end point of your flick to your upper lash line. Once you have the shape mapped out on both sides and everything looks symmetrical, fill in the open space.
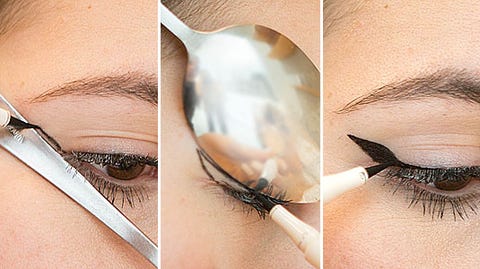
Makeup Tip #4: Use a Spoon as a Stencil Winged Liner
Kathleen Kamphausen
If freehand drawing your cat eye just isn’t gonna happen for you, grab a spoon and use it as a stencil. Holding the stem of a spoon against the outer corner of your eye, use a liquid eyeliner to draw a straight line as the first step for your cat eye. Then, flip the spoon so it’s hugging your eyelid, and use the rounded outer edge to create a perfectly curved winged effect.
Makeup Tip #5: Hack a Smoky Eye With a Hashtag
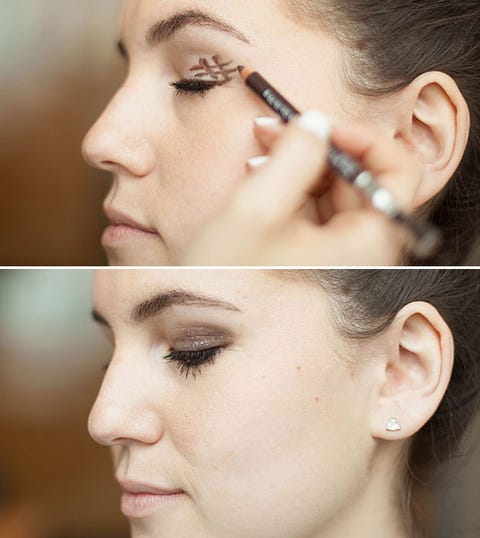
A smoky eye can go from sultry to sloppy real fast if you don’t know what you’re doing. To keep it simple, use a creamy eyeliner to draw a slanted hashtag symbol on the outer third of your eyelid, then blend it out with the sponge or a . This will not only ensure that both eyes are symmetrical, but also prevent you from getting a little too crazy with the eyeliner.
Makeup Tip #6: Use a Spoon as a Mascara Shield
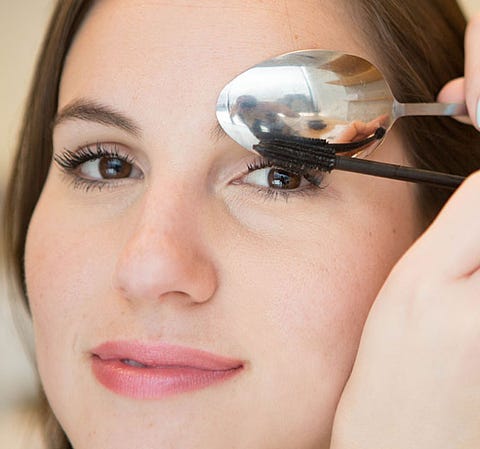
Nothing is more annoying than making your eyeshadow look perfect, and then swiping on mascara and ruining the whole thing with smudges. The fix? Hold a spoon so it’s hugging your eyelid, then apply your mascara like you normally would. As you sweep the mascara wand against your lashes and back of the spoon, the residue will coat the back of the utensil rather than your skin. Genius.
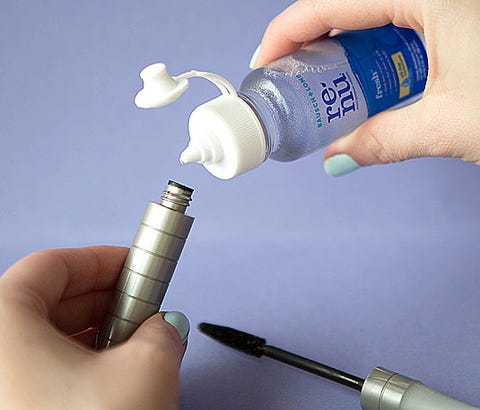
Makeup Tip #7: Revive Mascara With Saline Solution
Kathleen Kamphausen
Word of advice: Only use a tube of mascara for three months, max. Beyond that point, it can collect bacteria and lead to eye infections and other unfortunate things you wouldn’t want to search on Google Images. But if your mascara annoyingly dries up within those first three months, add a couple drops of saline solution into the flaky formula to get it back to its smooth consistency.
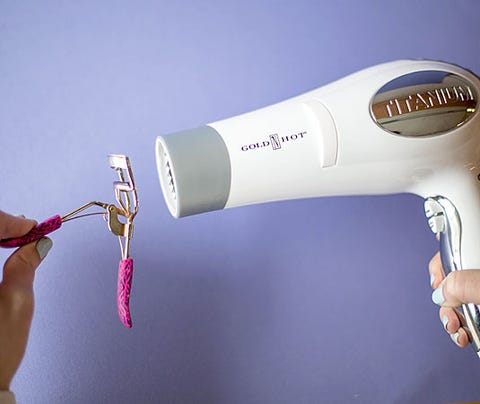
Makeup Tip #8: Heat Your Eyelash Curler With a Hair Dryer
Kathleen Kamphausen
DIY your own heated lash curler by blowing hot air on your eyelash curler. The added heat will help your lashes curl faster and keep the shape for longer. Just hit your lash curler with a blow dryer until it heats up, wait until it cools slightly but is still warm (test it on the inside of your arm so you don’t burn your eyelid), then clamp down on your lashes to curl them.
Makeup #9: Plump Your Lashes With Translucent Powder
Dust some translucent setting powder on your lashes between coats of mascara to plump up your lashes. The translucent powder helps grip the mascara in between coats, leaving you with fuller, more voluminous lashes.
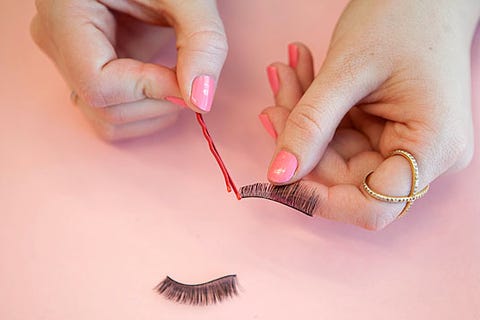
Makeup Tip #10: Apply Eyelash Glue With a Bobby Pin
Kathleen Kamphausen
If you always make a mess with eyelash glue and end up with clumpy-looking fake lashes, try this makeup tip: Use the tip of a clean bobby pin to carefully apply a few dots of glue to the lash band and disperse it evenly. Wait a few seconds or until the glue is tacky and then pop the lashes on.
Makeup Tip #11: Set Your Lip Color With a Tissue and Powder
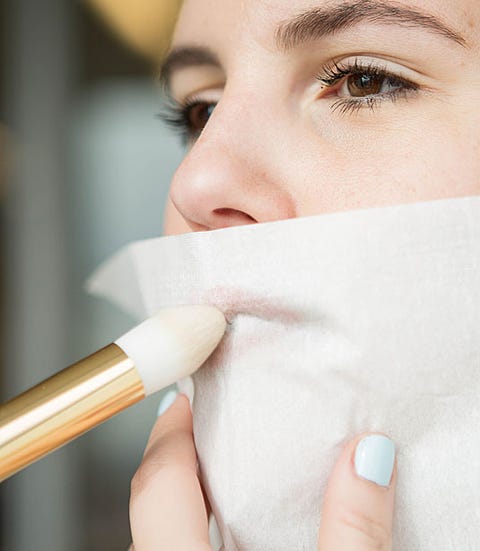
For lip color that lasts hours, just swipe on your shade, lay a tissue over your mouth, then dust translucent powder over the top to set the color from budging or bleeding. This process may seem ~extra~, but the payoff is 100-percent worth it. The translucent powder alone could alter your lip shade, but using the tissue as a shield will protect it from lightening or dulling.
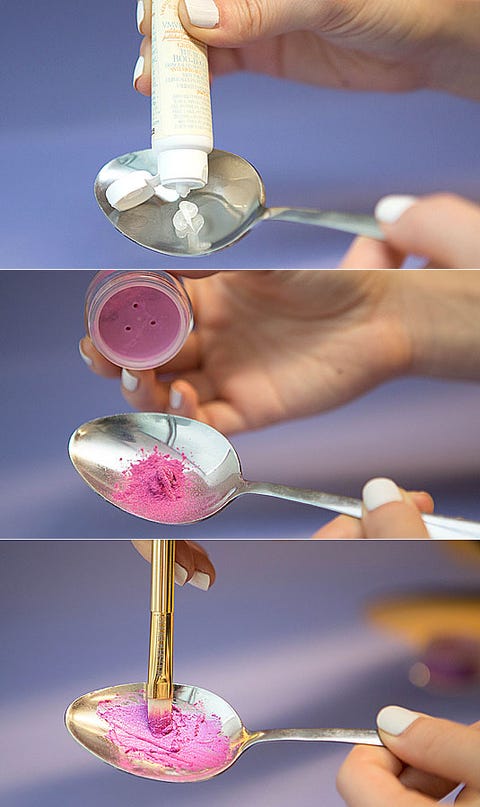
Makeup Tip #12: Mix Your Own Lip Color With Petroleum Jelly
Kathleen Kamphausen
If you have an eyeshadow that you love so much and also want to wear as a lip shade, mix the loose pigments with a little bit of petroleum jelly (Aquaphor or Vaseline works fine) in a spoon and just swipe it onto your lips. Boom. Your own, custom lip gloss. Best makeup tip ever.
Makeup Tip #13: Define Your Cupid’s Bow With an “X”
The easiest and quickest way is define your cupid’s bow is to take a lip liner in the same shade as your lipstick and create an “X” that lines up with your natural lip line. Then fill in the bottom three sections of the “X” with lipstick and continue applying it as you normally would to complete your look.
Makeup Tip #14: Conceal Under Your Eyes With a Triangle Shape
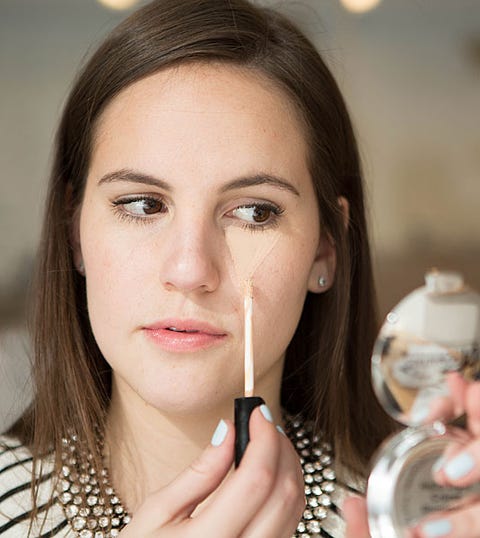
If you want to really brighten your under-eye area, stop dotting on your concealer and try applying it in a triangular shape. Draw the base of the triangle directly under your lash line and the tip pointing toward the apple of your cheek. This helps fully conceal any redness and shadows to create the illusion of brighter under eyes.
Makeup Tip #15: Use a Brush Handle as a Contour Guide
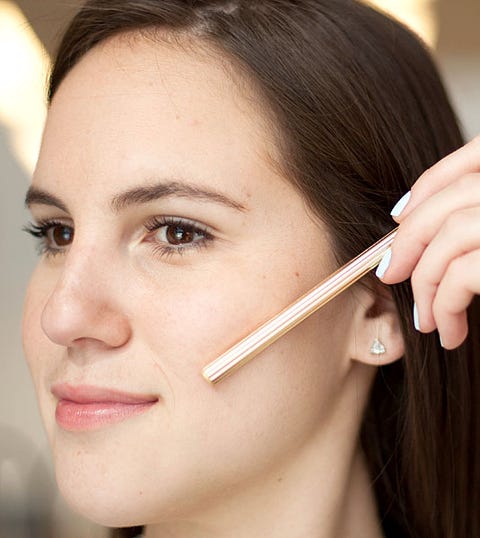
Everyone’s face is shaped differently, so where your BFF might be doing her contour may not be the best place for you to do yours. To tell where you should be dusting on your bronzer or contour powder, roll a pencil, pen, or makeup brush handle right below your cheekbone (directly in the pocket underneath the actual bone) to find the right angle for your face. Once you’ve found the correct placement, dust some bronzer right below it with a contouring brush, then blend the color out to soften it.
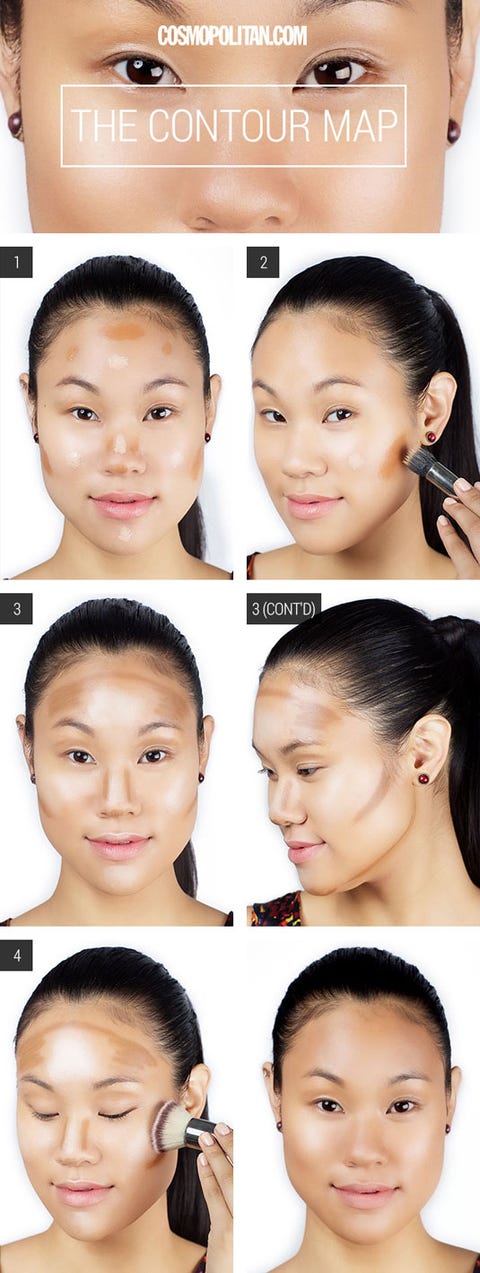
Makeup Tip #16: Map Your Contours With a Brow Pencil
Elizabeth Griffin
Don’t have a cream contour stick? No problem. After you’ve applied your foundation, mark the areas you want to contour—the hollows under your cheekbones, your temples, along your hairline, jawline, the sides of your nose, the tip of the nose, and the crease of your eyes—with a deeply colored . Yep, you read that right. Brow gel pencils are really concentrated, yet very smudge-able, which makes them perfect for contouring.
Makeup Tip #17: Blot Your Oil With a Clean Toilet Seat Cover
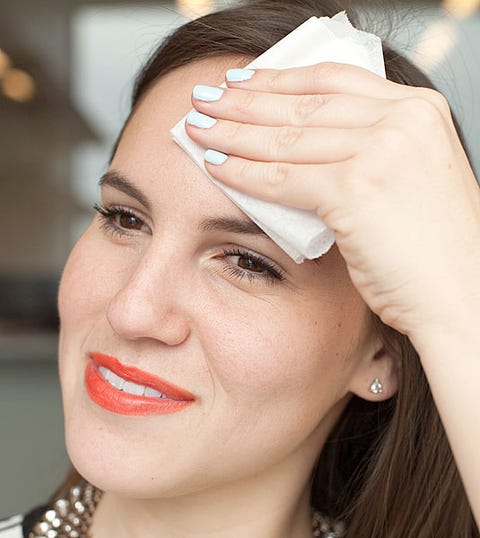
Okay, yes, this sounds gross, but hear me out! Both blotting papers and toilet seat covers are made out of similar materials and will help soak up the excess oil on your skin. So, if you’re in a pinch and headed to the bathroom to freshen up anyway, grab one of these covers and pat it over your T-zone to decrease any excess oil on your face.


